How to Diagnose and Repair Your Air Conditioner (A/C) Capacitor
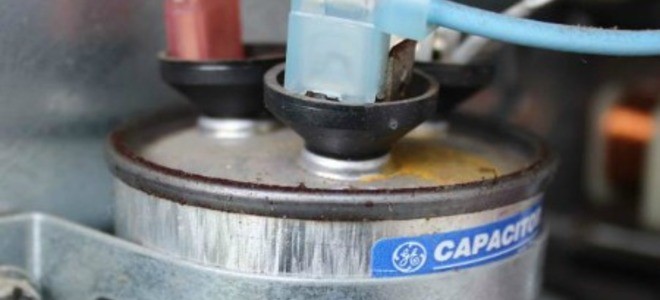
What’s Wrong With Your Air Conditioner?
Capacitors Are a Common Cause of Air Conditioning Breakdowns
So it’s a hot day in the summer sun. The family is coming over this weekend and you’re very busy making all the necessary arrangements, when suddenly the A/C quits working. Perfect timing, right?
Well, before you call the local HVAC technician to come fix the unit and re-allocate the money you were going to spend on burgers, take a quick look. Perhaps you’re about to luck out by making a simple repair that will only cost you a few dollars and take very little time. It’s also helpful to find out whether your air conditioner is still under warranty, in case you want to replace it later on.
If you need to fix it right away, you won’t need any special tools, and you may not have to rearrange your entire day. Just a few minutes, a couple of tools you likely have around the house, and these instructions could save you a significant amount of money while keeping your family gathering right on track.
Quick Overview: How to Replace an A/C Capacitor Yourself
| Step | Detail |
|---|---|
| 1. Turn off the power to the unit at the disconnect or breaker panel. | Do not proceed if you do not know how to do this. |
| 2. Find and inspect the capacitor. | Remove the service panel, locate the start capacitor, and check to see if it’s mishapen. |
| 3. Discharge the power of the capacitor. | Be very careful in this step — watch the video below for details. |
| 4. Dismount the old capacitor. | It should be simple to unscrew the metal band holding it in. |
| 5. Note down how the wires connect. | Do this before you remove them! |
| 6. Disconnect the wires. | You can remove them with needle-nosed pliers. |
| 7. Choose a replacement. | Know the micro-farads (μF) and the voltage rating, or the make and model of A/C |
| 8. Buy a replacement and attach. | Check your local contractor supply store. |
See below for more detailed information and pictures.
What Is a Capacitor?
Capacitors are small cylindrical objects that store energy. They either send a jolt to start a motor or send jolts to keep a motor running. They work with the compressor, the blower motor, and the outside fan in your air conditioner.
Checking Your Air Conditioning Capacitor
A voltmeter, if you have one, can tell you if you have blown a capacitor, but it’s even simpler to find out just by watching and listening. Take a walk outside to your condensing unit, and look and listen for the following:
- Do you hear any humming?
- Do you see the fan spinning?
If the A/C is humming but the fan is not running, you may have a capacitor problem.
A Simple Trick to Test if the Capacitor Is Working
If the A/C is humming but the fan is not turning, find yourself a long skinny stick. Gently slide the stick through the fan grate and give one of the fan blades a gentle push, to see if the fan will spin. If the fan takes off on its own and keeps going, you very likely have a bad start capacitor.
You see, the capacitor is there to give a boost to the fan motor upon startup. A capacitor stores power in a roll of electrically charged sheets of material.
When the capacitor is called to action, it is supposed to release its energy and give the fan a sort of electrical kick in the pants. If the capacitor is shot, the fan can’t quite get going from just the 120 volts the motor supplies to it. You and your stick just took over the job of the start capacitor.
There are a few things that could have caused your capacitor to blow. The heat of summer plus motor heat could have proven to be too much for the part, or it could be something else.
Below I’ll go over how to fix this problem yourself.
Does this sound like what’s going on with your A/C?
1. Start by Turning Off the Power
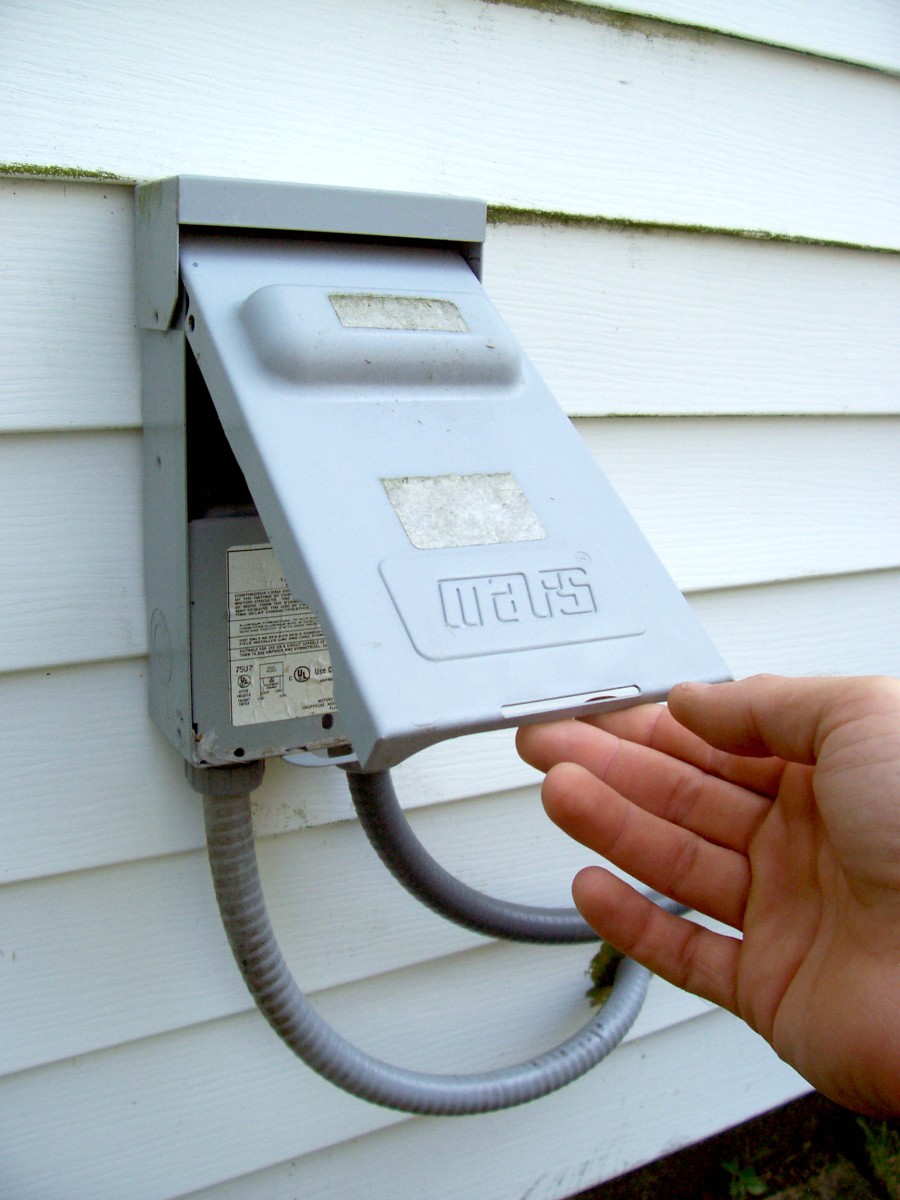
First of all make sure you know how to turn off power to your air conditioner. Don’t proceed if you do not.
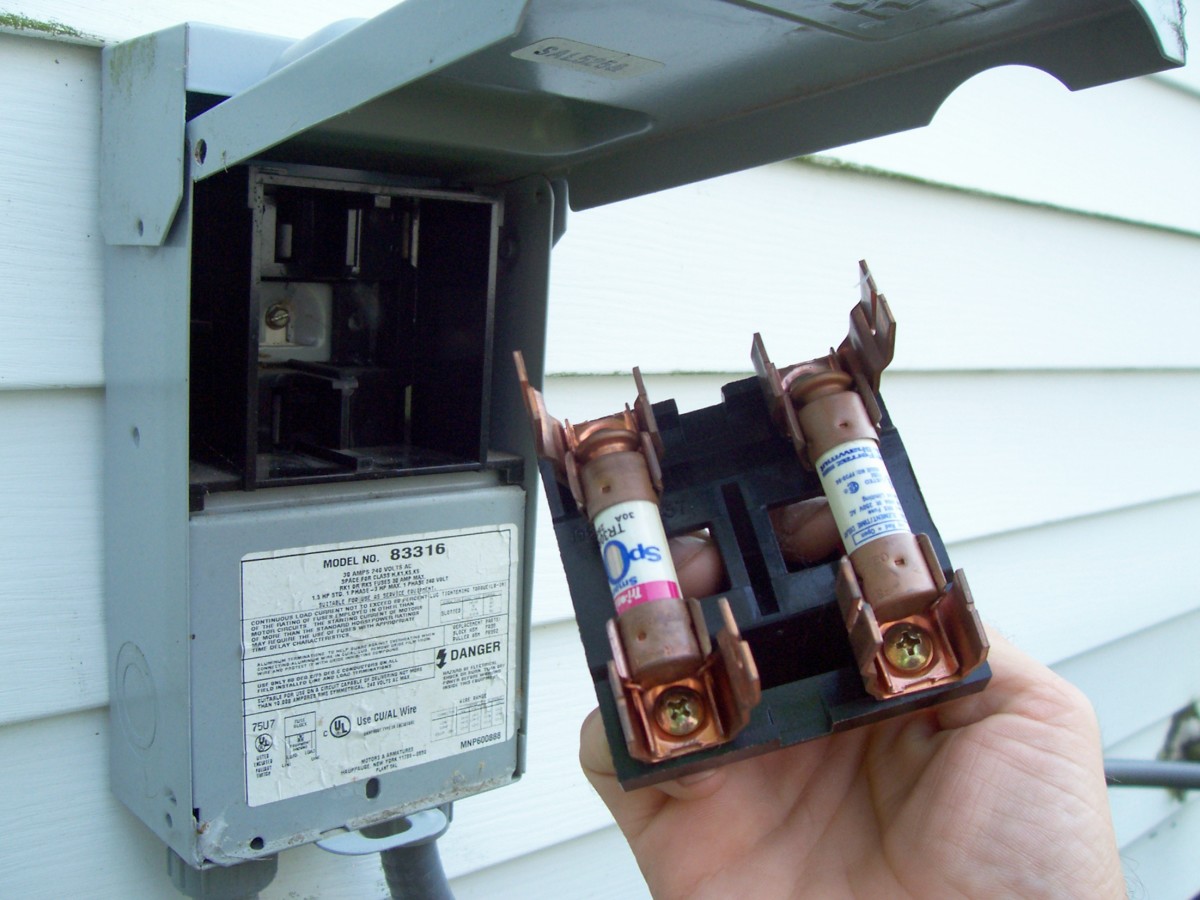
- Turn off the power to the unit at the disconnect or breaker panel, which should be mounted on the outside of the house within a few feet of the outdoor condensing unit.
It’s always a good idea to double check that the power to the unit has been disconnected successfully with a circuit alert device. There’s an example of a reliable and very inexpensive circuit alert device in section three of this article.
2. Finding and Inspecting the Capacitor
After you have turned off the power at the disconnect:
- Remove the service panel on the A/C unit itself.
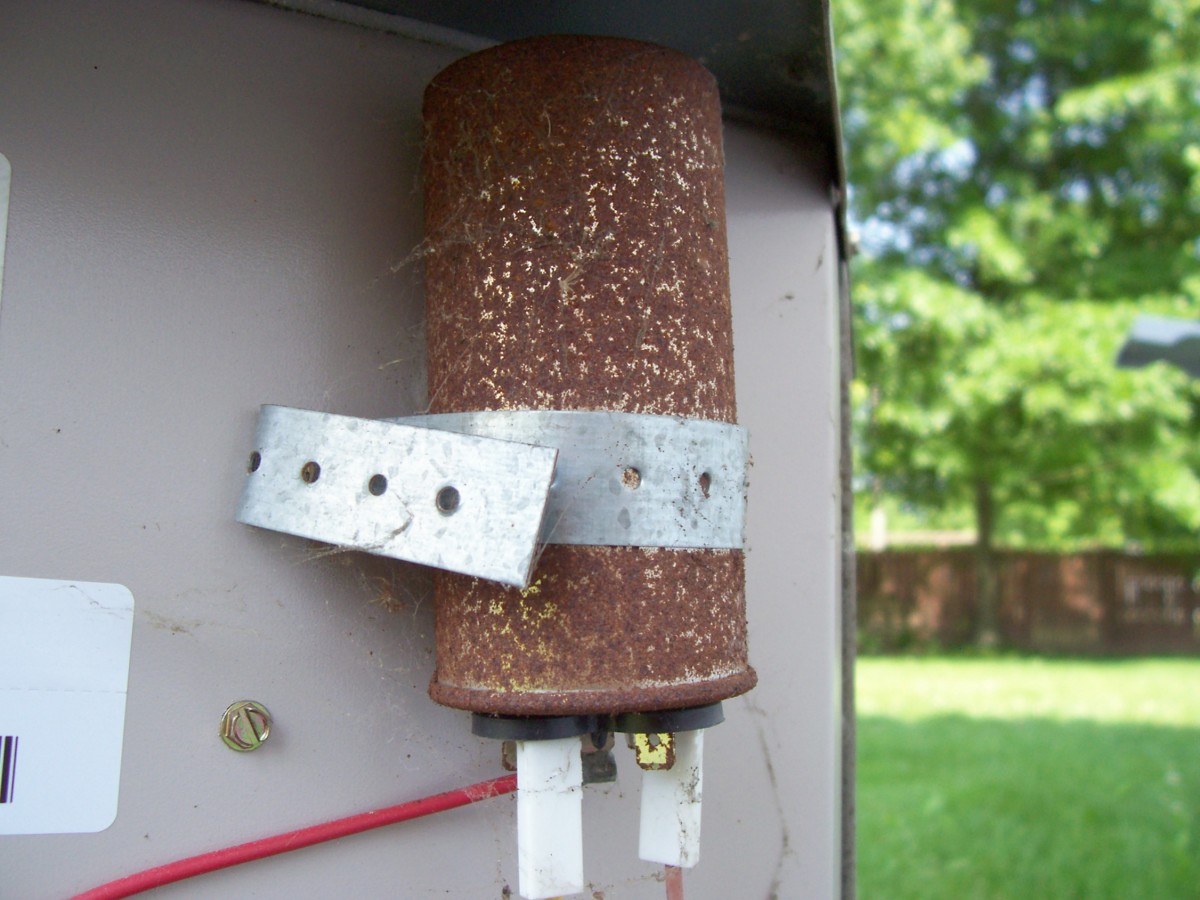
- Locate the start capacitor. (It’s most likely silver, round or oval, and with multiple prongs on the top for wire connections.)
- Look at the capacitor surface where the prongs are attached, and ask yourself: does this surface look raised or domed?
One tell-tale sign that a capacitor is shot is its shape. When a capacitor blows, at least 95% of the time its top will be pushed up or swollen, somewhat resembling a pop can that has been dropped and is ready to explode when given the chance. Is this what you see? If so, this is good news, and we’ll have you back up and running in no time.
3. Discharging the Power in the Capacitor
You’ve already shut off power to the air conditioner, but now you will have to discharge the power in the capacitor.
WARNING: As I mentioned, a capacitor stores power. That has not changed because you’ve shut off the flow of electric current. The capacitor may still have power ready to fire. Touching two of the terminals at the same time with your hand will discharge this power and make for a shocking experience. Throwing away a capacitor that hasn’t been discharged could cause a fire in your trash can. Before you continue, discharge your capacitor by placing an insulated-handle screwdriver across the terminals, as shown in the video below.
Sperry Instruments VD6504 Non-Contact Voltage Detector, 50-1000 V AC, Black, 5 Sensors In this video, he refers to his “circuit alert device” multiple times. This is a very important safety device that can save you from a really bad day. All you do is touch the area you are going to be working on with the end of this pen-like device and it will beep if there is unsafe electrical current nearby. It has saved me more than once. Even after you’ve pulled the disconnect switch, double check that things are safe with one of these. This is a must-have if you do any of your own work around the house. The picture here is of the Sperry one that I use—it’s inexpensive and reliable. The button below will show you the current price on Amazon.
4. Dismounting the Old Capacitor
Now that your old capacitor has been discharged, and you’ve re-confirmed that no electrical current is in the area where you’ll be working with your circuit alert device (above), you can remove it. This is very simple. The capacitor is likely mounted to the unit by a metal band that has only one screw to remove. Remove that screw and the capacitor should come loose from the unit itself.
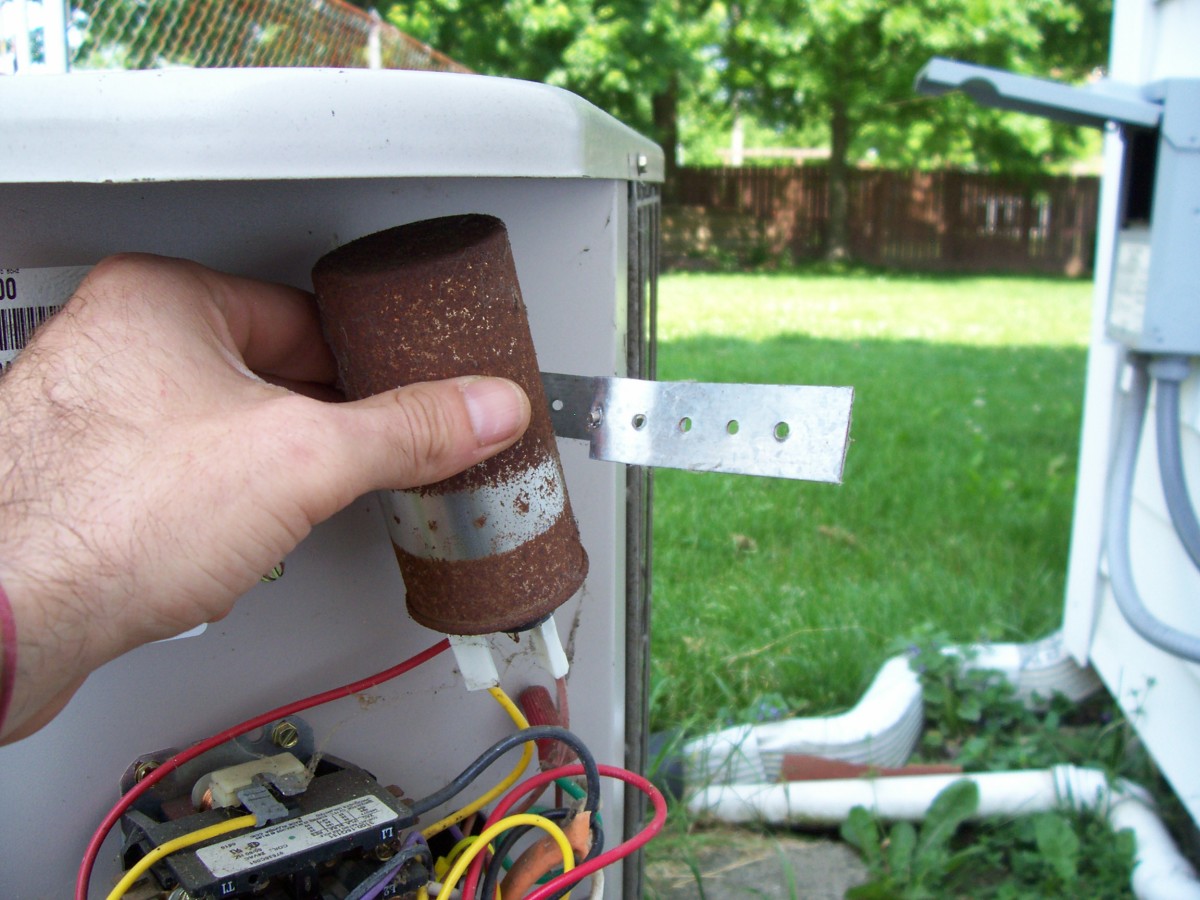
5. Noting Down How the Wires Connect
Before you remove the wires from the old capacitor, be sure to make a diagram or label showing what wire goes where.
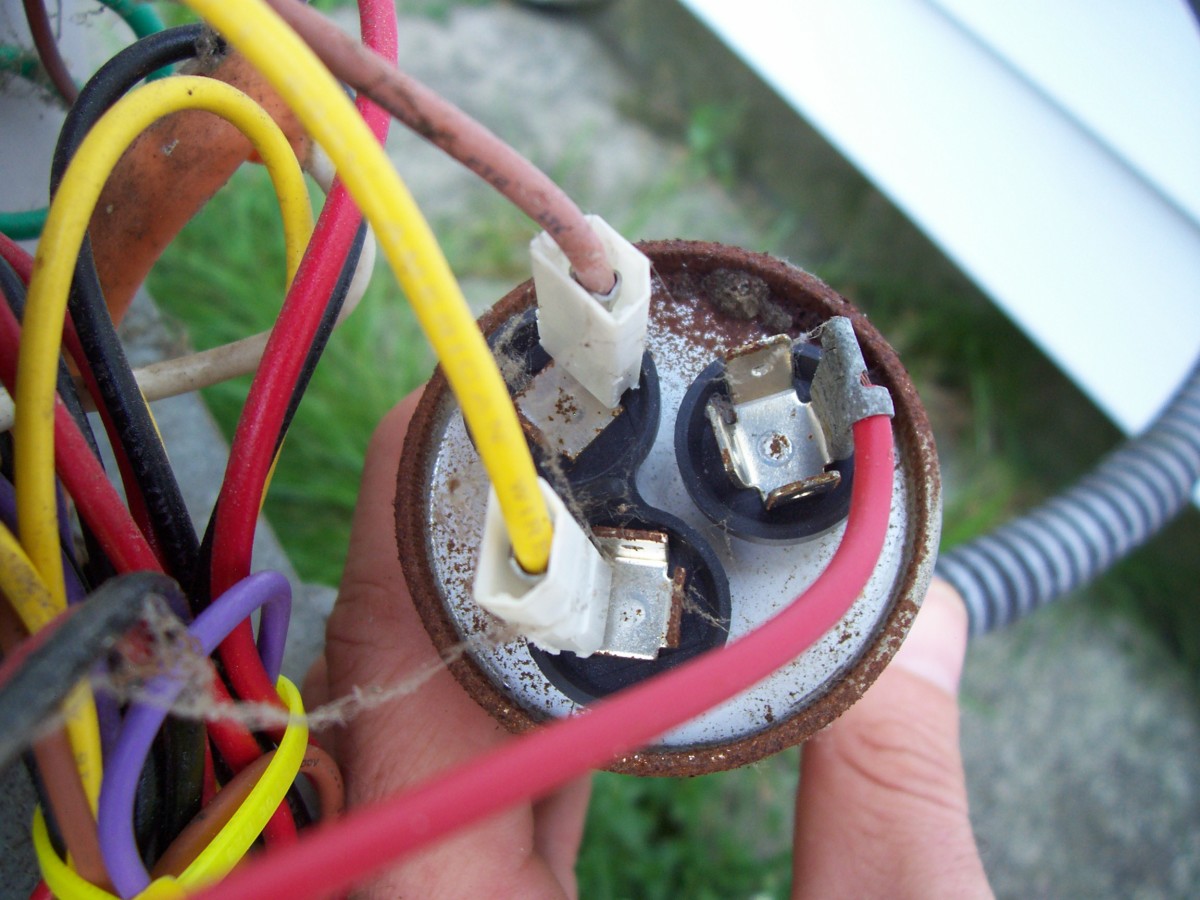
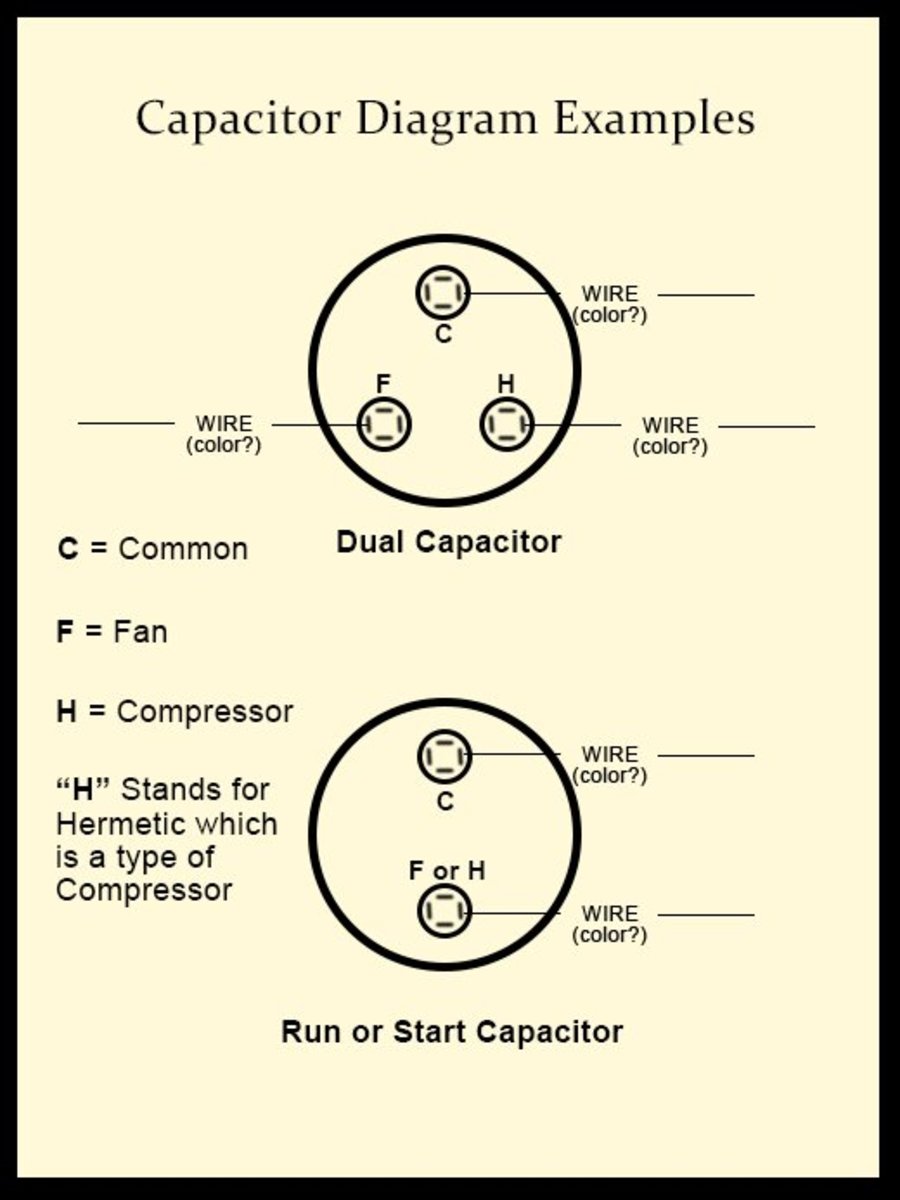
6. Disconnecting the Old Capacitor
Once you’re sure where the wires will connect to the new capacitor, you can remove the wires using a simple pair of needle-nosed pliers. If the wires are tight, try not to just yank on them; use a rocking motion while pulling slowly. This will help keep you from touching another terminal, or possibly having the pliers slip and hit you in the face. Don’t laugh, I’ve watched it happen.
That’s it. Now all you need to do is obtain the right replacement part and re-install it just as you removed this one.
7. Choosing a Replacement
There are a couple of things you’ll want to know when shopping for your new capacitor: the micro-farads (μF) and the voltage rating. The shape and size of the capacitor aren’t really important as they can vary and still do the job. Even your mounting bracket will probably bend to accommodate a part of a different shape. Just know that you have to match the micro-farad number exactly. The voltage rating does not have to be identical, as it shows the amount of voltage the capacitor can see, not what it has to see; this means that if you need to you can use a capacitor with a slightly higher voltage rating than what you have now.
Your μF and voltage will be marked on your capacitor and will likely read something similar to 35/5 μF and 370V. If they are not written down, write down the make and model of your air conditioning unit, and use that information at the store or online to find the correct replacement part.
Lastly, brand is not important here. A capacitor is a pretty universal part, and should be available at your local contractor supply company, though maybe not at a Home Depot or Lowe’s.
A capacitor for a residential-sized unit should be relatively cheap, and you may consider buying a second one for backup while you are there, along with a couple of spare time-delay fuses (but be sure to buy the right size fuse).
A/C Fuses
In the heat of the summer, blown capacitors and fuses are a very common cause of air conditioner breakdowns. If you suspect fuses are the problem, it can be an even easier fix. Take a look at the article I wrote about how to replace air conditioning fuses.
Your air conditioners fuses are located in the A/C disconnect that should be mounted to the house within a few feet of the condensing unit outside. Be sure if you are purchasing new fuses that they are of the proper amperage rating. You can always use a lower amperage fuse but never bigger.
If lower, the worst thing that will happen is they will blow again. If higher, they can allow a larger power spike to enter the unit and the result will be nothing less than a catastrophic failure in the unit. You are likely in need of two 20 or 30 amp time delay fuses.
Air Conditioning Maintenance Tips
I hope this was the answer to your A/C problem and that you were able to obtain and replace the part without any hang up for your family get-together.
The heat of the summer sun, added to the heat hard-working motors normally generate, can be tough on our air conditioners because hot electrical components break down more easily. So it’s not surprising a part may fail on a hot day when you need it the most.
Keeping up on your A/C maintenance can help prevent these types of breakdowns. Keeping your air conditioner’s coils clean and your air filter cleaned or changed when needed can keep the running temperature of your unit down, thus helping to keep your own temperature down when the summer comes calling.
For those with window units, when winter time comes around, you might want to remove the unit and store it somewhere to protect it from frost, dirt, and debris.
Thanks for stopping by, and again, I hope this helped you and saved you money.
Đặt dịch vụ như thế nào?
Đặt trực tiếp từ mẫu tìm dịch vụ tại trang web này
• Bước 1: Chọn nhóm dịch vụ mà bạn quan tâm
• Bước 2: Chọn loại dịch vụ bạn cần đặt (lưu ý, nếu hệ thống đã tự động chọn đúng dịch vụ bạn cần chuyển đến bước 3)
• Bước 3: Nhập vào số điện thoại để dịch vụ có thể liên hệ với bạn.
• Bước 4: Nhập vào khu vực mà bạn cần gọi dịch vụ, lưu ý bạn có thể lựa chọn địa chỉ tương đối mà hệ thống gợi ý ở gần điểm mà bạn muốn được cung cấp dịch vụ nhất. Trường hợp địa chỉ của bạn đã có trong danh sách gợi ý này thì rất tốt, bạn có thể chọn nó, tuy nhiên có nhiều địa chỉ quá chi tiết mà hệ thống không thể xác định được trên bản đồ như ngõ/ngách/hẻm hoặc tầng trong các khu nhà cao tầng. Với các địa chỉ chi tiết, bạn có thể ghi chú ở bước thứ 5 hoặc cung cấp cho dịch vụ biết khi họ gọi điện cho bạn.
• Bước 5: Nhập vào Ghi chú, vấn đề bạn gặp phải hoặc địa chỉ chi tiết để gửi đến dịch vụ...
• Bước 6: Bấm nút Gửi yêu cầu tìm dịch vụ gần bạn...
Tải ứng dụng Rada để đặt dịch vụ
• Bước 1: Bấm nút tải ứng dụng Rada theo điện thoại tương ứng mà bạn đang sử dụng dưới mẫu đặt dịch vụ; Trường hợp bạn truy cập bằng máy tính, hãy mở điện thoại để quét mã QR ở góc phải bên dưới màn hình để chuyển đến kho cài ứng dụng
• Bước 2: Khi chuyển đến kho ứng dụng, bạn bấm nút cài đặt để cài ứng dụng Rada vào máy điện thoại của mình. Tiến hành đăng ký để tạo tài khoản bằng cách nhập vào số điện thoại, chờ hệ thống gửi mã xác thực để hoàn thành đăng ký tài khoản
• Bước 3: Chọn nhóm dịch vụ mà bạn quan tâm, tiếp tục sau đó chọn dịch vụ mà mình cần rồi đọc kỹ thông tin giới thiệu về dịch vụ; xem kỹ bảng giá mà chúng tôi cung cấp sau đó bấm nút đặt dịch vụ phía dưới màn hình
• Bước 4: Nhập vào địa chỉ, hệ thống sẽ lấy số điện thoại mà bạn đã đăng ký làm số liên hệ, tiếp tục điền vào nội dung Ghi chú, vấn đề bạn gặp phải hoặc địa chỉ chi tiết để gửi đến dịch vụ... bạn cần yêu cầu dịch vụ, tiếp tục chọn thời gian bạn muốn cung cấp dịch vụ
• Bước 5: Khi hoàn thành, tiếp tục bấm nút gửi yêu cầu để bắt đầu tìm dịch vụ
Lợi ích khi đặt dịch vụ từ hệ thống Rada
• Mạng lưới dịch vụ liên kết với Rada có mặt rộng khắp trong cả nước vì vậy bạn có thể đặt ở bất cứ nơi nào dịch vụ cũng có thể đáp ứng
• Ngay sau khi kết nối thành công, dịch vụ sẽ gọi điện cho bạn trong vòng 1 phút để xác nhận dịch vụ và trao đổi chi tiết
• Ứng dụng Rada kiểm soát tất cả các ca cung cấp dịch vụ được dịch vụ cung cấp, vì vậy bạn có thể khiếu nại, đánh giá bất cứ khi nào bạn không thấy hài lòng
• Rada chỉ cung cấp dịch vụ thông qua ứng dụng và trang web vì vậy mọi thông tin sẽ được lưu trữ lại để đảm bảo có thể tra cứu và xử lý bất cứ khi nào bạn muốn
• Giá cả dịch vụ được công bố sẵn trên web và ứng dụng Rada để bạn tham khảo và trao đổi với dịch vụ
• Rada là ứng dụng kết nối dịch vụ đạt giải Nhân tài đất Việt 2017 với hơn 7 năm hoạt động, đến nay đã có 10,504 nhà cung cấp dịch vụ, 138,486 người sử dụng và 232,166 yêu cầu đã thực hiện thành công sẽ mang lại trải nghiệm tốt nhất khi bạn đặt dịch vụ từ mạng lưới dịch vụ của mình.


